This post discuss about uploading files from Windows/Linux Machines to Oracle Object Storage on OCI cloud.
Oracle Cloud Object storage bucket is highly durable and capable of storing maximum size of 10TB of unstructured data
Object storage is of two types
Object storage Standard – Frequently(multiple copies are maintained )
Object storage Archive – Archival (Audit Purpose)
Scenarios for Oracle Object Storage usage
- On-Premise to cloud migration projects -> where to transfer large amount of Data
- On-Premise/Cloud Backup to Oracle Object Storage, Extension of the On-Premise data center to cloud with limitless storage
- Enhance disaster recovery and business continuity using cloud storage
OCI COMMAND LINE INTERFACE (CLI)
The CLI is a small-footprint tool that you can use on its own or with the Console to complete Oracle Cloud Infrastructure tasks.
The CLI provides the same core functionality as the Console, plus additional commands. Some of these, such as the ability to run scripts, extend Console functionality.The Python code makes calls to Oracle Cloud Infrastructure APIs to provide the functionality implemented for the various services.
These are REST APIs that use HTTPS requests and responses.
Pre-Requisite for OCI CLI
- An Oracle Cloud Infrastructure account.
- A user created in that account, in a group with a policy that grants the desired permissions. This account user can be you, another person, or a system that calls the API.
- A keypair used for signing API requests, with the public key uploaded to Oracle. Only the user calling the API should possess the private key. See Configuring the CLI.
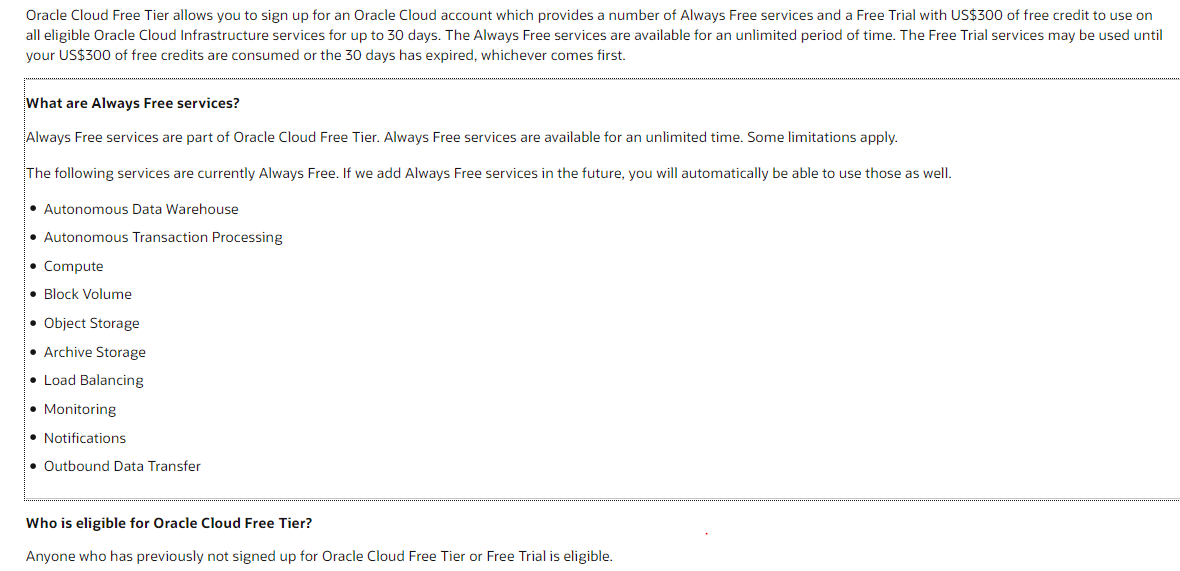
If new to Oracle Cloud and want to try, you can easily create a free account by accessing below link https://www.oracle.com/ae/cloud/free/#free-cloud-trial,
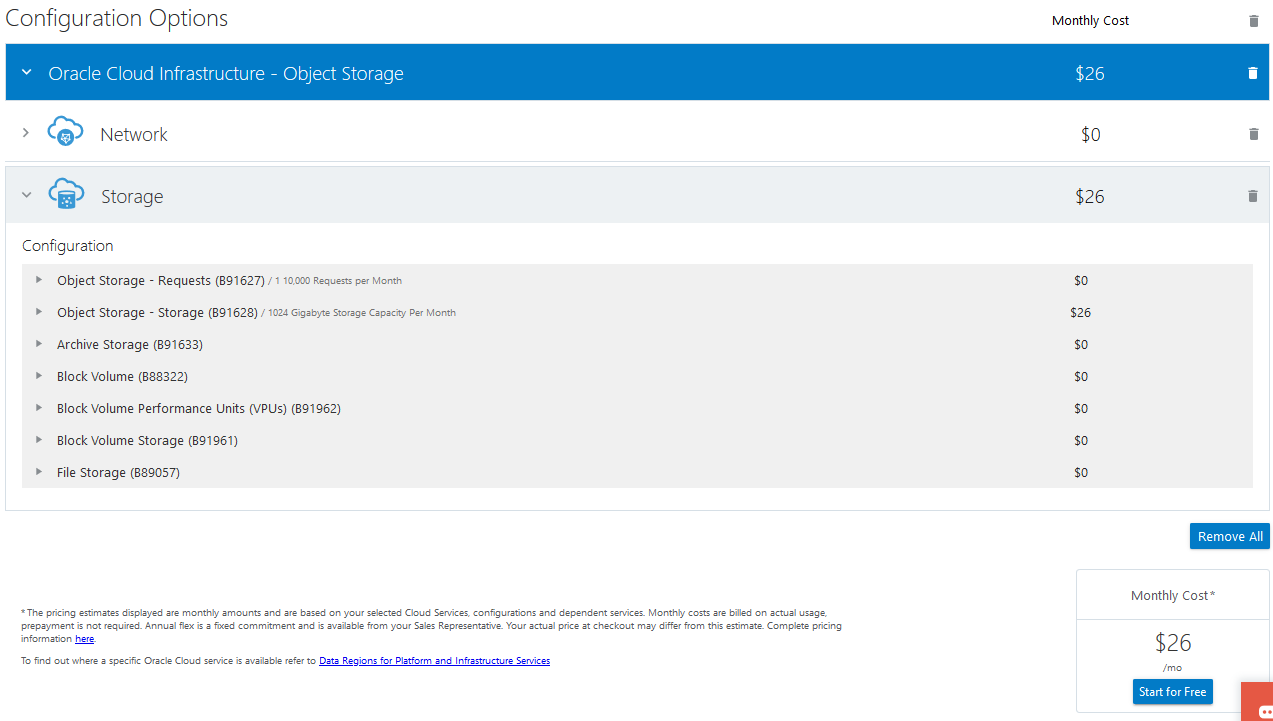
If want to use OCI cloud, can do cost estimation on by clicking on the cost-estimator link, and check the cost create a new account and use credit card details https://www.oracle.com/cloud/cost-estimator.html
for more details visit my blog on how to Create a free account on Oracle
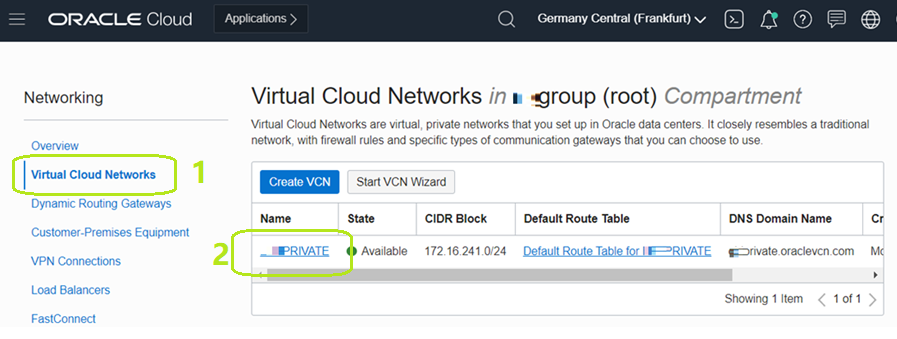
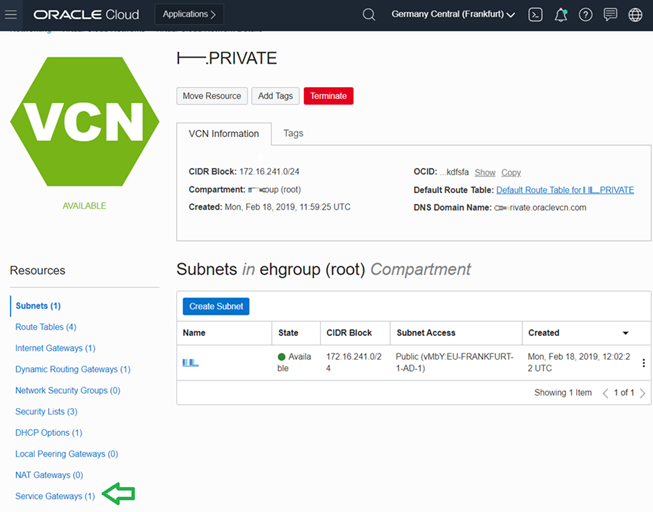
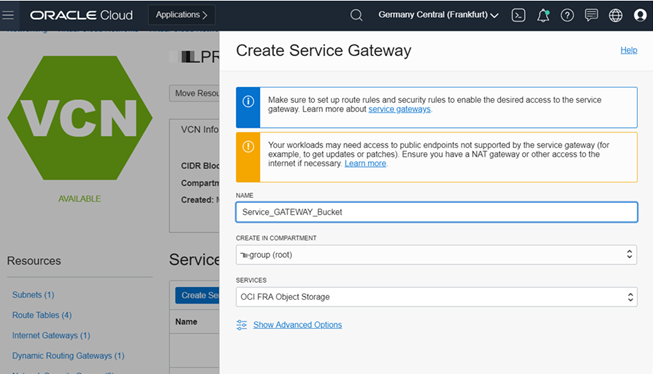
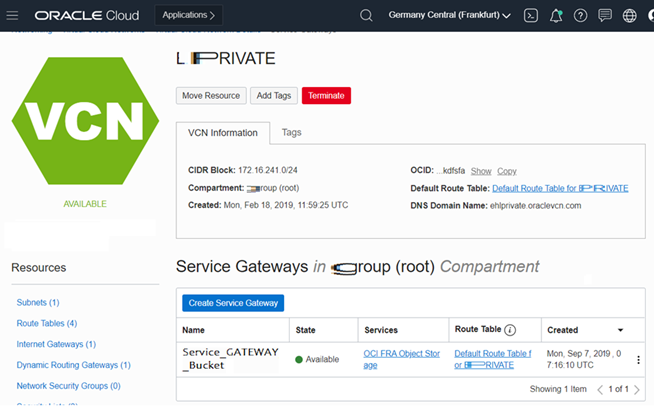
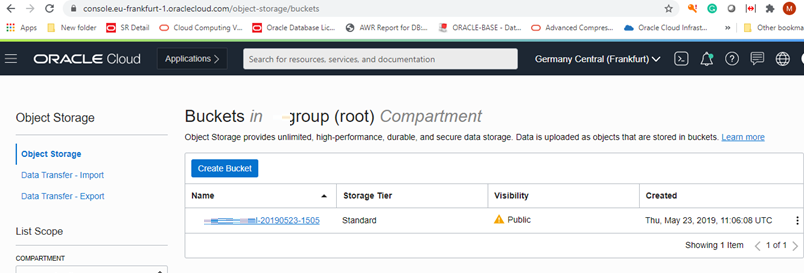
CREATE OBJECT STORAGE SERVICE GATEWAY
Login to OCI Console with
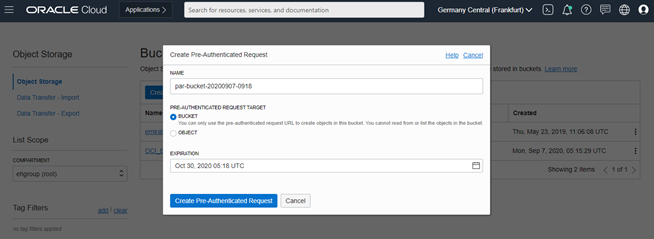
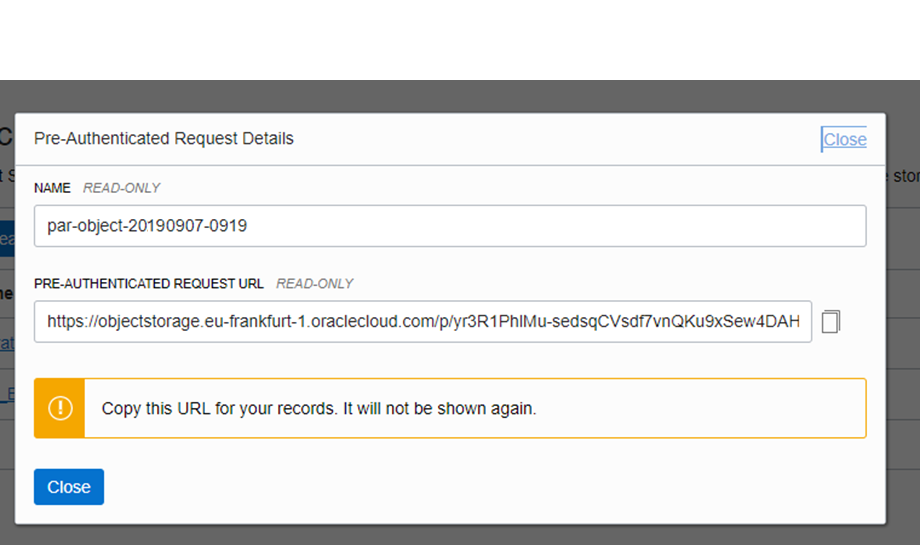
Create A New Bucket
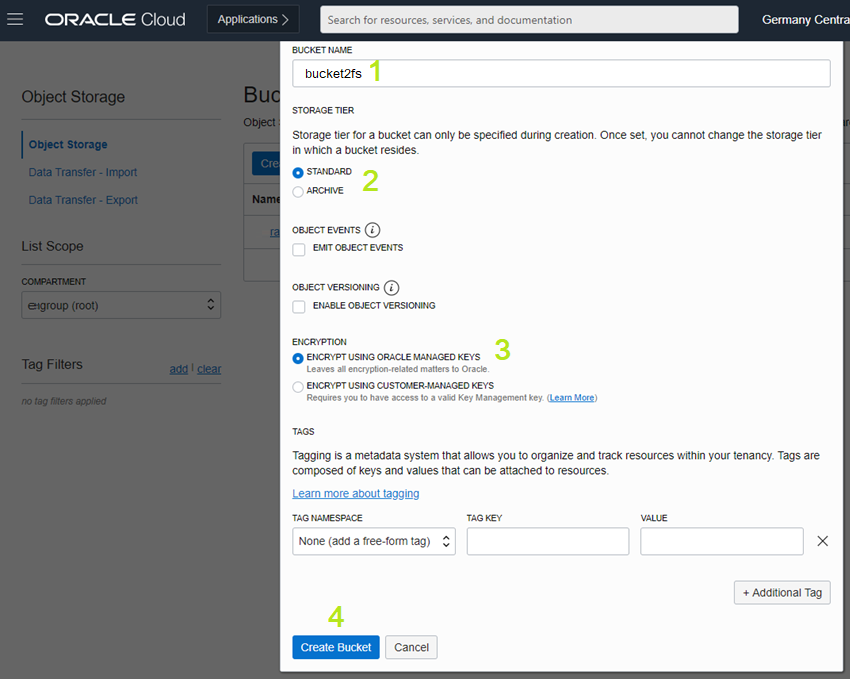
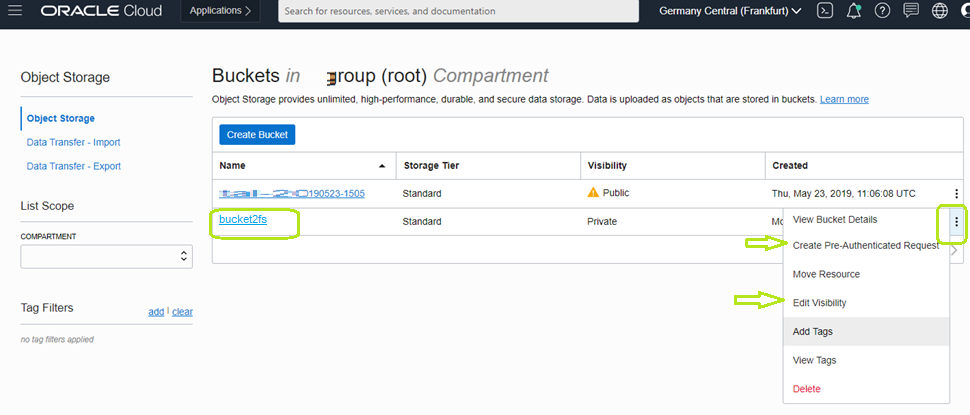
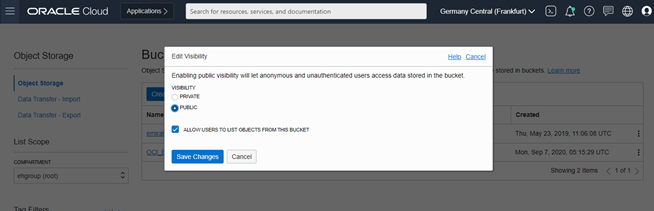

Now we are ready to configure OCI CLI for windows and Linux
CONFIGURE OCI COMMAND LINE INTERFACE FOR WINDOWS
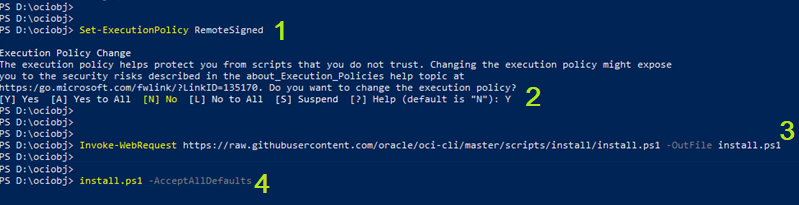
Open Windows Powershell as administrator. The installer enables auto-complete by installing and running a script. To allow this script to run, you must enable the RemoteSigned execution policy. To configure the remote execution policy for PowerShell, run the following command
Configure the remote execution policy for PowerShell
Set-ExecutionPolicy RemoteSigned
Download the installer script:
Invoke-WebRequest https://raw.githubusercontent.com/oracle/oci-cli/master/scripts/install/install.ps1 -OutFile install.ps1
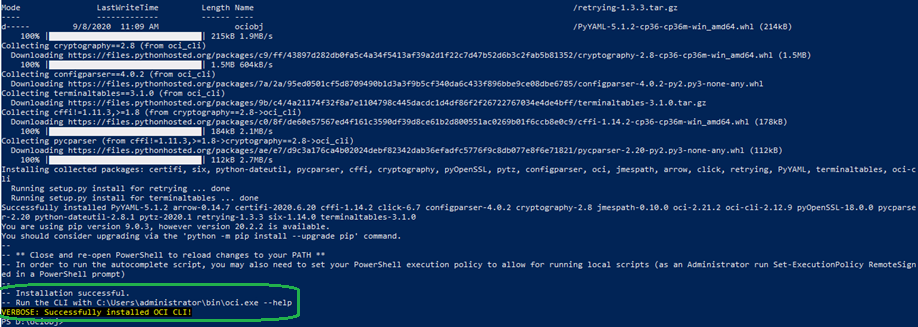
Run the installer script without prompting the user
install.ps1 -AcceptAllDefaults

SETUP OCI
Login to Cloud Portal and collect the details User OCID, tenancy OCID, region.
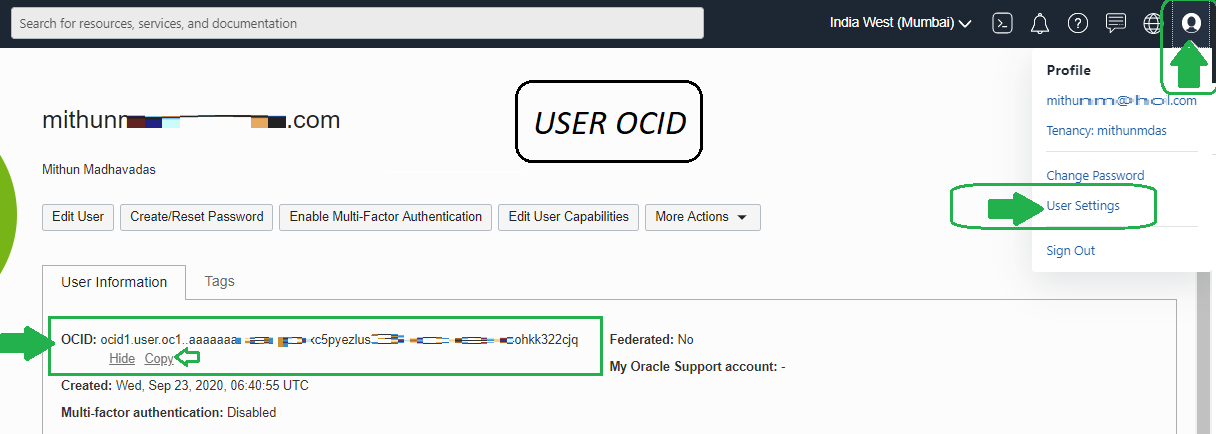
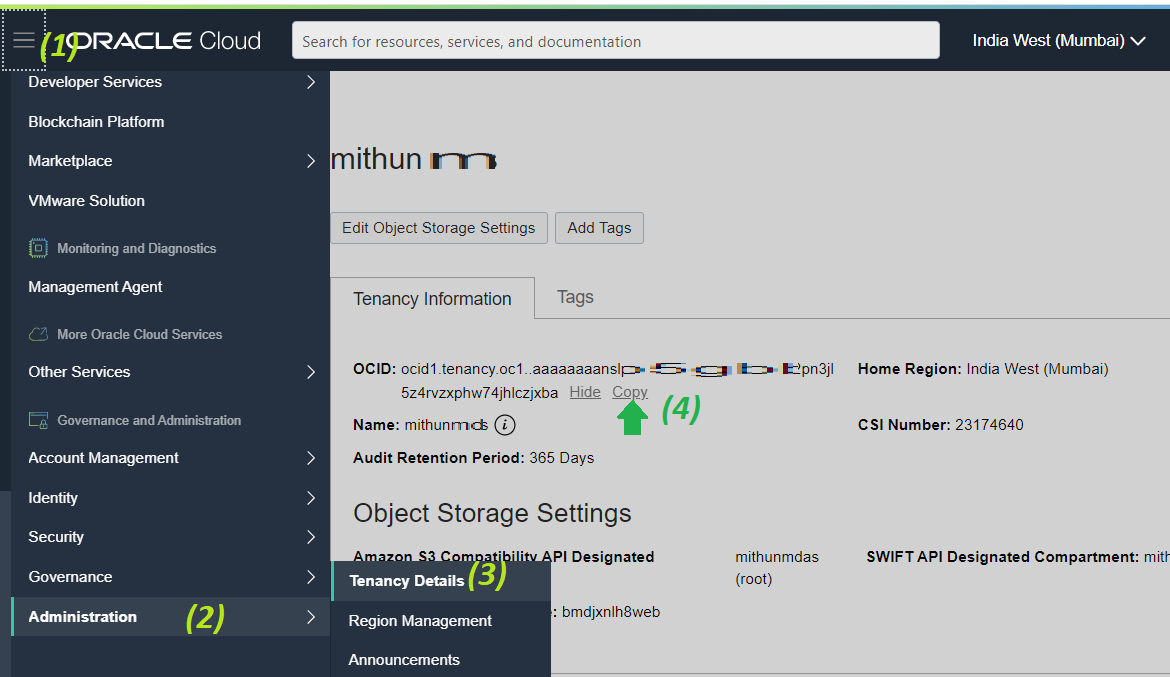
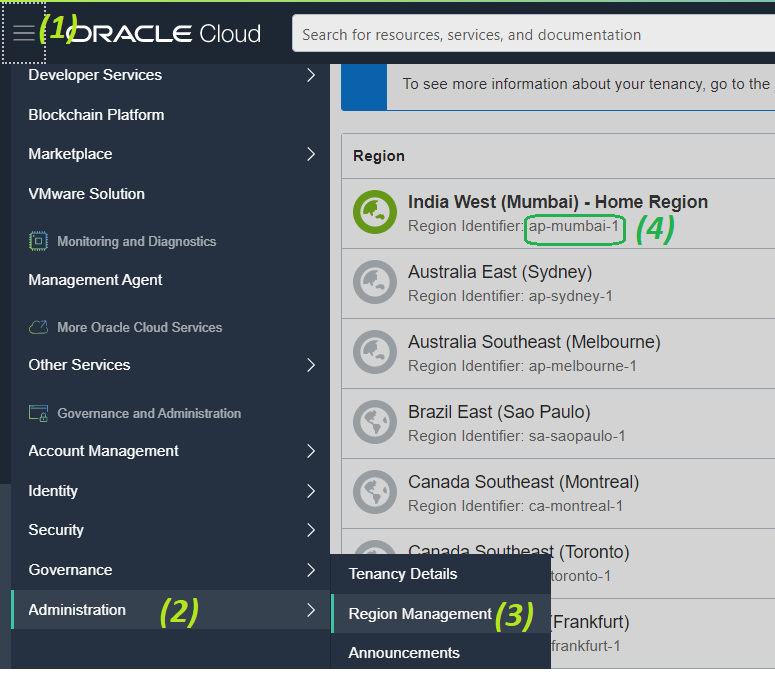
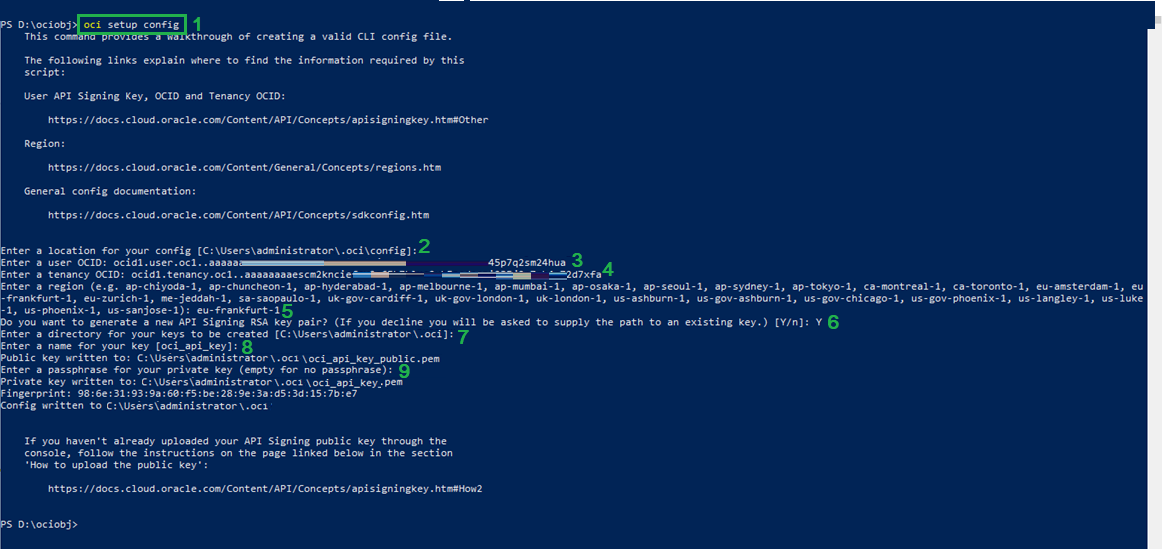
Execute oci setup config command with the details gathered from Cloud console
Upload Public pem file to Oracle Cloud


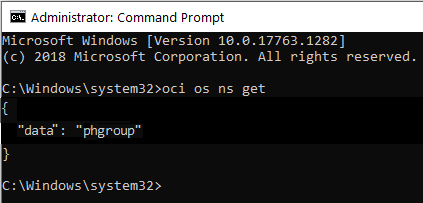
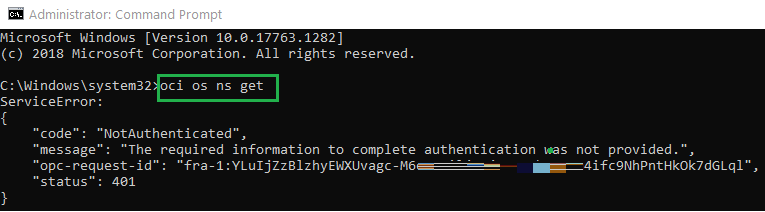
It’s now time to access the Bucket from the Windows Machine. Open command prompt with Run as administrator and execute oci os ns get (Command to find Namespace)
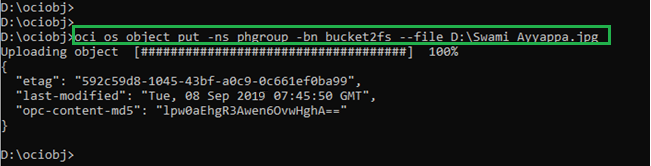
Command to Push file to OBJECT STORAGE
oci os object put -ns phgroup -bn bucket2fs –file D:\Swami_Ayyappa.jpg
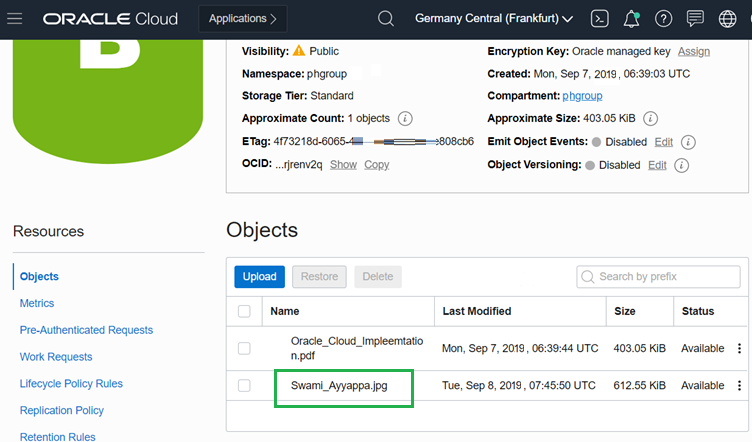
Check uploaded file on Cloud Console
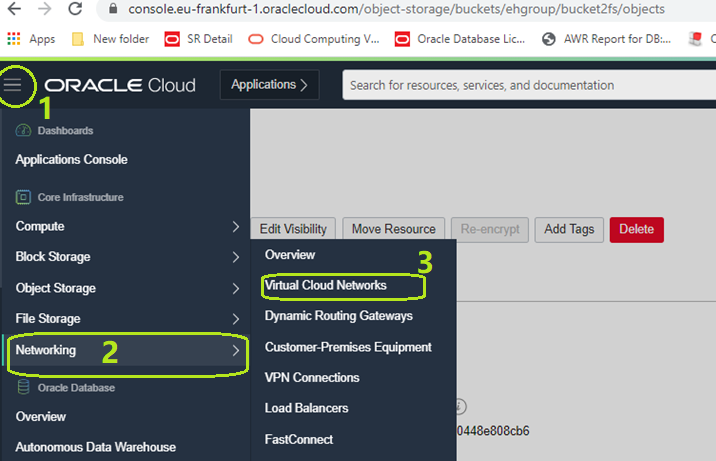
Click hamburger menu > Object Storage > Object Storage > Choose Bucket Name(bucketfs)
CONFIGURE OCI COMMAND LINE INTERFACE FOR LINUX
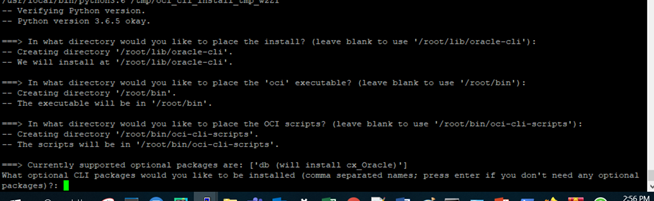
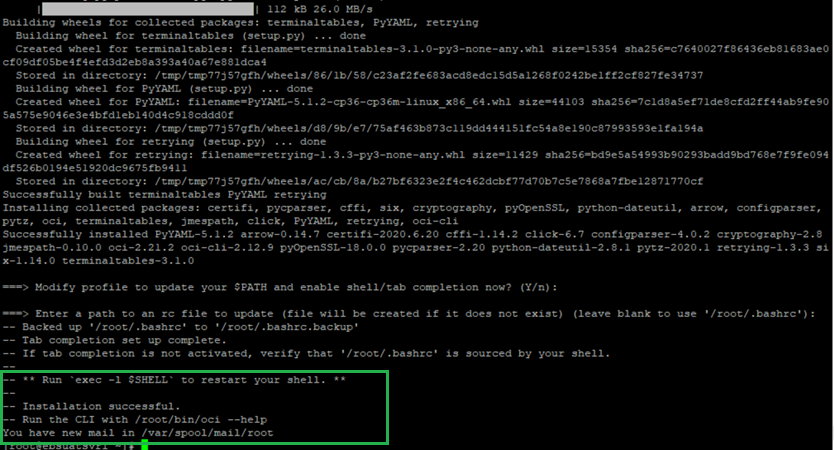
Login to Linux server as root user where you want to configure OCI CLI. We can use yum to install the CLI or Installer script to execute the curl command that will download and install the CLI.
The installer script will automatically installs the CLI and its dependencies, Python and virtualenv. Here we are proceeding with installer script, need to respond to some actions, most which mentioning in the screenshot.
bash -c "$(curl -L https://raw.githubusercontent.com/oracle/oci-cli/master/scripts/install/install.sh)"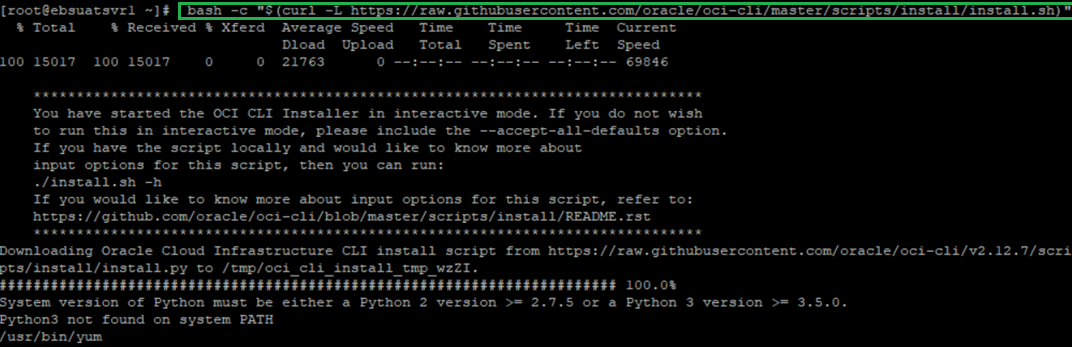
We are now ready to setup OCI CLI
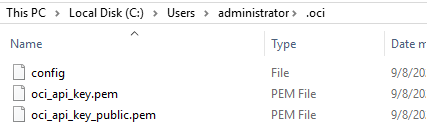
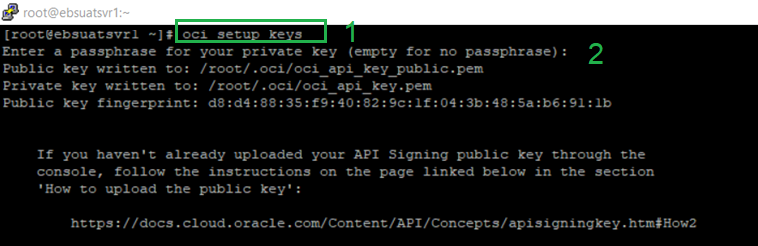
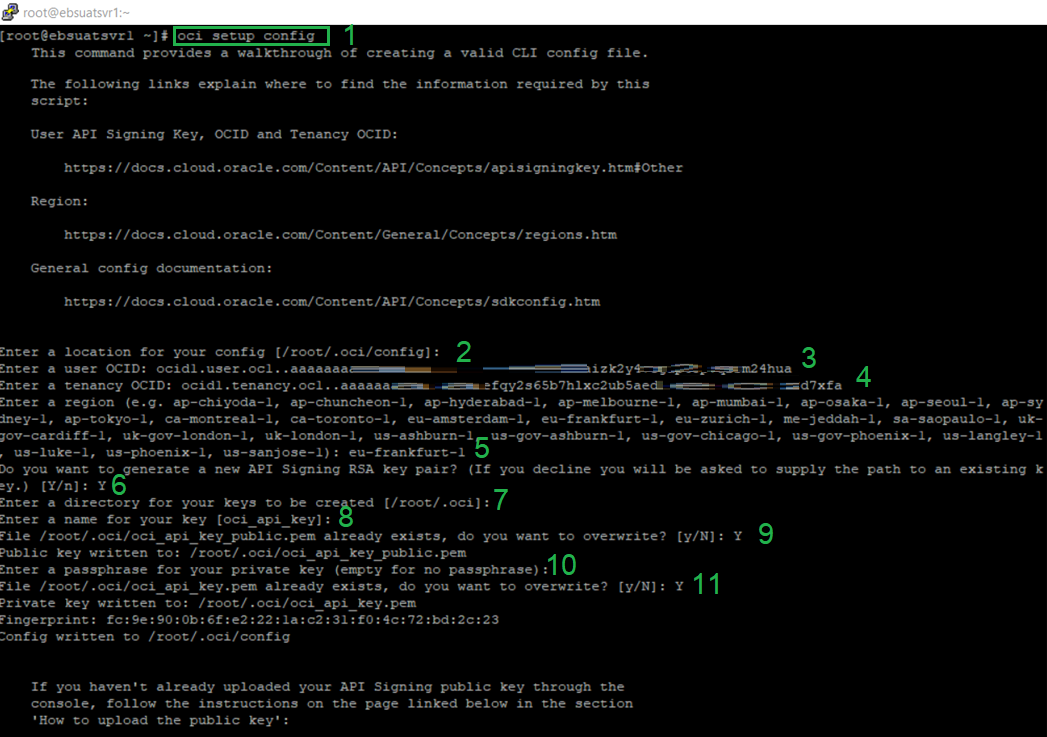
Setting up the Config File
Before using the CLI, you must create a config file that contains the required credentials for working with Oracle Cloud Infrastructure. You can follow below steps to create pem key on linux and then Setup Dialog
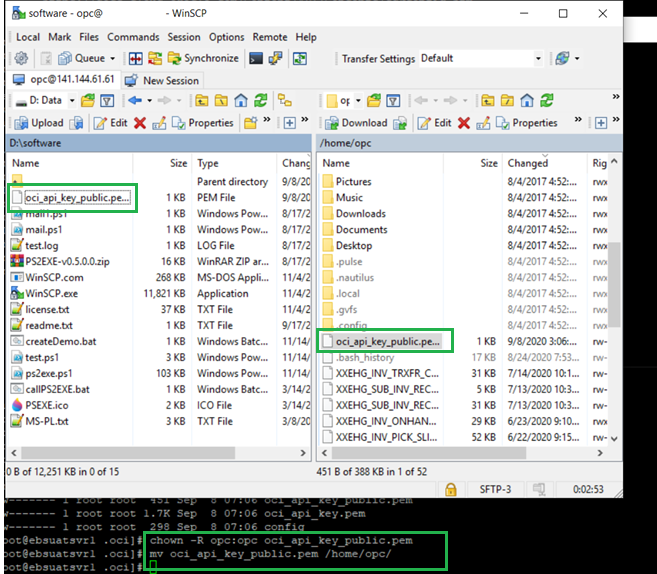
Now we will get the Public .pem key from the Linux server and upload to Oracle cloud. Here my Linux is in Oracle OCI-C (Old Oracle Cloud). Using winscp we will copy the .pem file. Since Using OPC os user for winscp we are chaning the owner of the oci_api_key_public.pem file to opc and moving to OPC home
chown -R opc:opc /root/.oci/oci_api_key_public.pem
mv /root/.oci/oci_api_key_public.pem /home/opc/
Never copy paste the public pem file to a text file and upload to Oracle Cloud User Profile Setting. This will result in error.
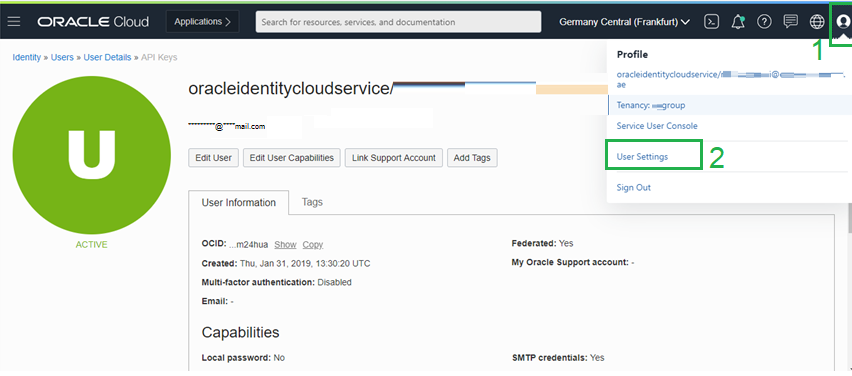
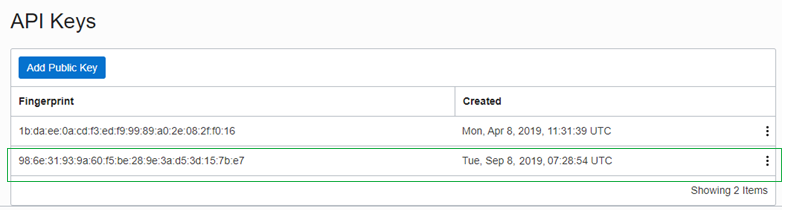
Upload Public pem file to Oracle Cloud Click on Profile icon and select User Settings > Click On API Keys > Add Public Key
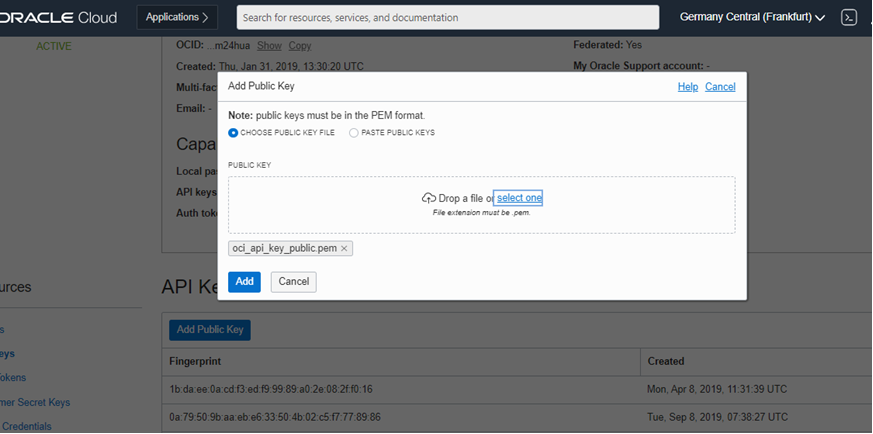
Successfully Added Key,
It’s now time to access the Bucket from the Windows Machine. Open command prompt with Run as administrator and execute oci os ns get (Command to find Namespace)
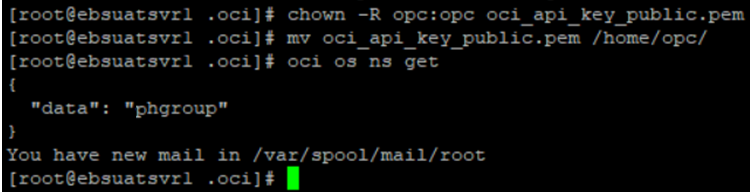
if out put give with data, means everything configured well, If error ” need to trouble shoot and fix before proceeding
Command to Push file to OBJECT STORAGE, oci os object put -ns ehgroup -bn bucket2fs –file /mnt_2019/apm_verify.log

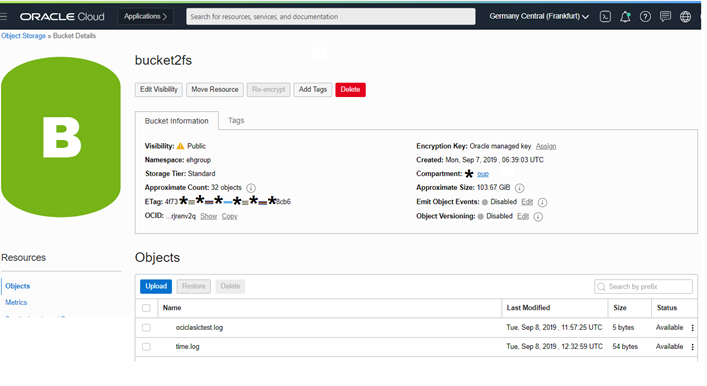
Check Linux uploaded file on Cloud Console
Click hamburger menu > Object Storage > Object Storage > Choose Bucket Name(bucketfs)
OCI ADMINISTRATION COMMANDS
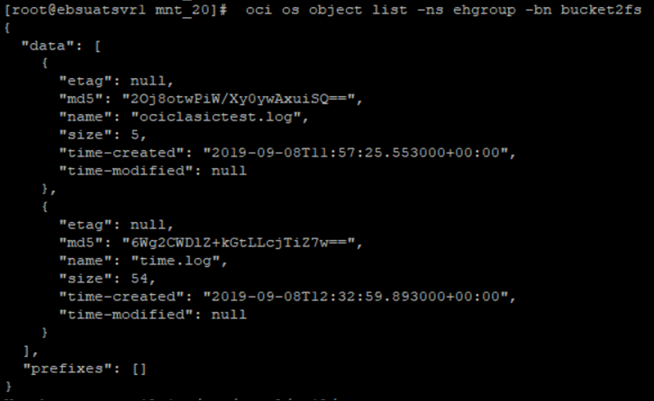
List the file on CLI
oci os object list -ns ehgroup -bn bucket2fs
Delete file from CLI
oci os object delete -ns ehgroup -bn bucket2fs –name ociclasictest.log

GET File from CLI
oci os object get -ns ehgroup -bn bucket2fs –file time.log –name time.log

BULK FILE UPLOAD AND DOWNLOAD
Upload -> oci os object bulk-upload -bn bucket2fs –src-dir /cloudupload/Oracle_Bckup/
Download -> oci os object bulk-download -bn bucket2fs –download-dir /clouddownload/Oracle_Bckup/
Goooddddddd Thank by you time
Thank you very much. This was very helpful.